How to shrink volume in Windows Server 2012 (R2) without losing data
Summary
Want to extend the c drive but has no unallocated space there? Don’t worry, you can shrink reduce disk partition in Windows server 2012, and then add the space to c drive.

2/05/2024
by Andrew Wright
Table of Contents
Introduction
A very plausible problem often encountered by thousands of the Windows Server operator is “How to shrink volume without losing data” There are various alternatives, software and diligent methods out there, but none seem to rectify the problem. Users rapidly get affected due to this activity and still they can’t shrink the size of the volume or even expand it without expecting a sever loss of the data.
DISKPART to Shrink Partition in Server 2012
Generally, Windows has provided with an eccentric service named "DISKPART" to help users to solve their various disk issues. But the interface of this program is rather complicated and troublesome, a small ineffective execution of the code can bring drastic effects. That is why the use of DISKPART is restricted to expert users or IT specialists.
Here are the steps to shrink volume with diskpart in server 2012
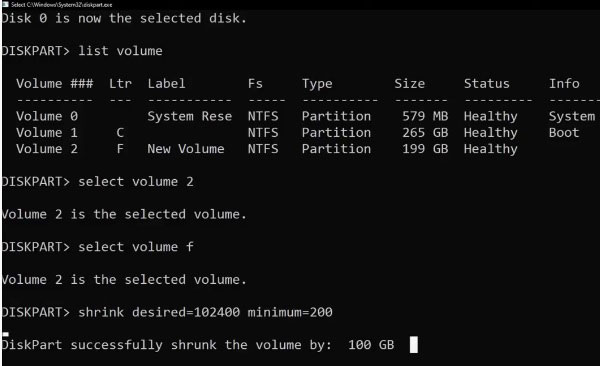
Here are the steps to shrink volume with diskpart
- 1, Run cmd and type Diskpart in the RUN (Run cmd with admin privileges)
- 2, Type "list disk" in diskpart and the diskpart will show a list disks
- 3, Type 'select disk *' and diskpart will get the * disk selected for further operations
- 4, Type 'list volume' and diskpart will list all volumes on the selected disk
- 5, Type 'select volume *' to get the one you want to shrink selected
- 6, Type "shrink desired=102400 minium=200" to shrink a 100GB if it's available from the disk.
Shrink partition with Disk Management in Windows Server 2012
Undertaking the trouble and problems Windows user have to face another alternative in the form of “Disk Management” is present in Windows. It can help you expand, shrink, merge, format or change the size of disk volume without any hesitation. However, a small limitation is still present over here.
Limitations
In order to shrink reduce disk partition Windows Server 2012, you will have to use administrator privileges, and other legalities also come into play.
No authentication or confirmation regarding the safety of the data or whether it would remain intact is provided in Disk Management.
You will most probably have to delete or format the entire disk volume to shrink or expand the drive.
During the conversion process, any subsequent power failure can render the whole operation corrupted and most likely your hard drive unusable.
Here are the steps to shrink a volume in Disk Management
Step 1 - Start disk Management from Start icon -> Run, and type Diskmgmt.msc
Step 2 - Right click a volume(namely partition/drive) that you want to shrink, and choose the option Shrink Volume in the pop up box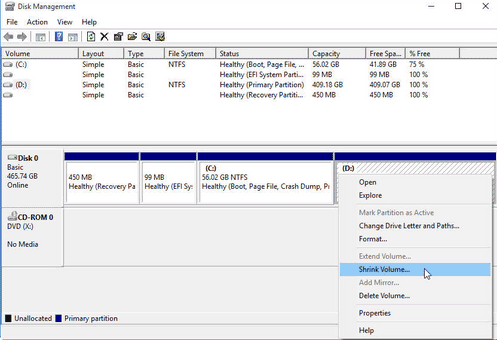
Step 3 - You have to enter the exact size that you want to create it to be unallocated space in the shrink size box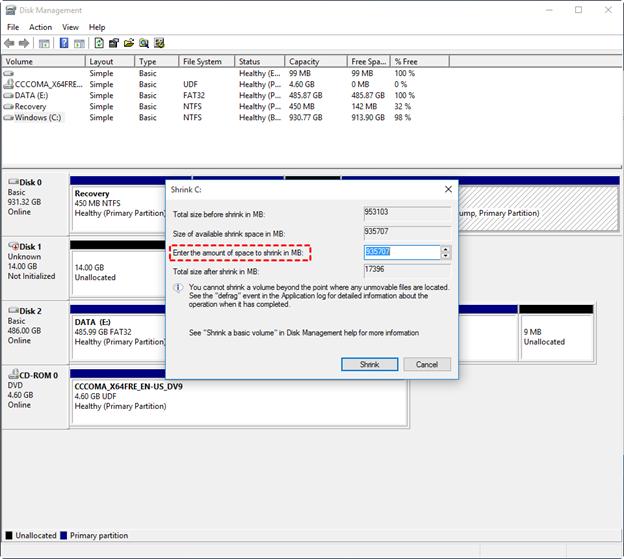
Step 4 - Proceed the steps and confirm the changes.
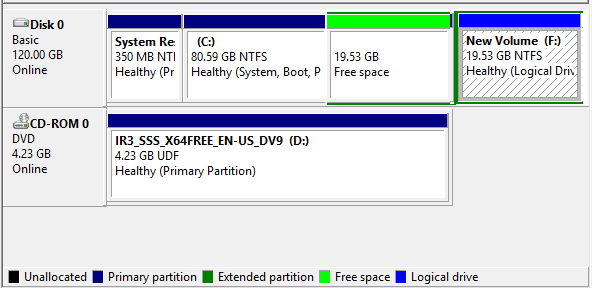
And then the disk partitions will have some Free space available on the disk map like this.
Note: Disk Management is unable to shrink c drive in server 2012. It could not move partition nor move unallocated space too. (Partition Resizer Server can help move unallocated spaces or move partitions without losing data)
Note: how to change free space to unallcoated space
Shrink partitions with IM-Magic Partition Resizer Server/Unlimited edition
We have something utterly remarkable and technically uplifting for you today, we are talking about IM-Magic Partition Resizer Server/Unlimited edition which can help you perform any disk operation like to expand, shrink, merge, format or simply duplicating the drives as well.
You will not have to submit any kind of permission, or whatsoever the process will go really smooth, and within no time you will have the implemented action completed on your hard drive. A “Rollback” feature is also present which allows you to terminate the operation any time you want and get back to the way things were without harming any data or formatting it.
1. Download and launch your Server edition of the IM-Magic Partition Resizer and wait for the disk map to load properly.
2. After you have all the available drives over your screen, simply select the one you want to shrink and right click over it.
3. From the drop down list choose "Move/Resize" option, and a new window shall open.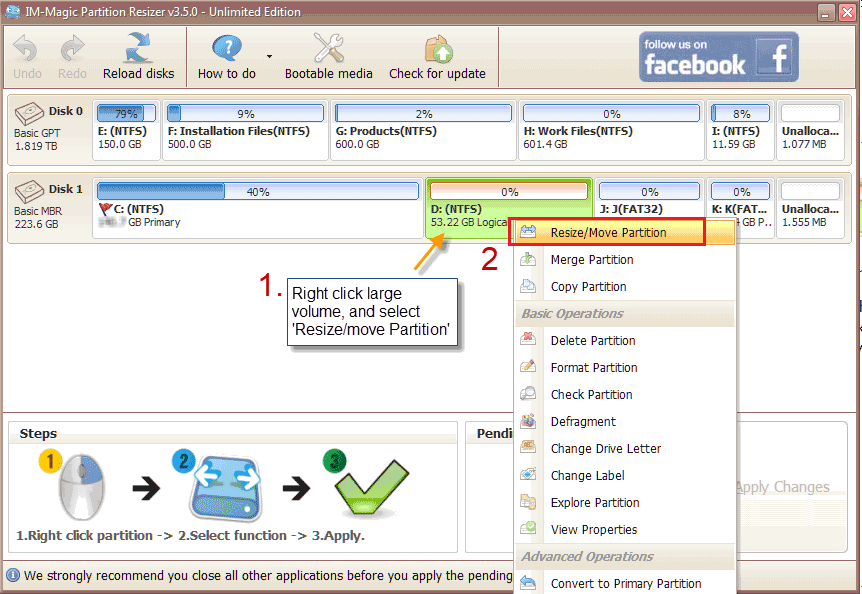
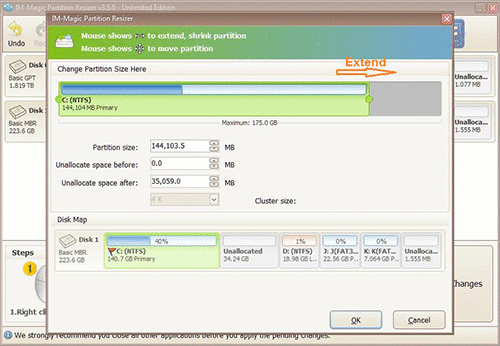
4. Move the cursor of your mouse to the left side rolling over the selected device, let go when the desired value approached.
 Steps to shrink volume in Windows server 2012
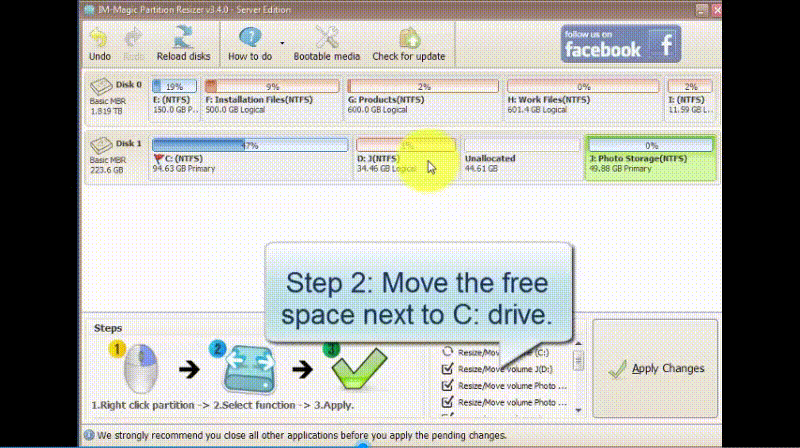
5. The shrunk volume will appear as unallocated volume, select the volume and then merge it into the desired volume directly if the unallocated space is just next to the target volume.
 Steps to shrink volume in Windows server 2012
Or you may right click the unallocated space to create a new partition per your needs.
6. After the process has been completed, click on “Save Changes” button and close the program.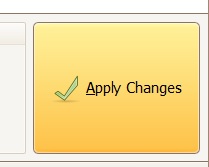
All your volumes would have been successfully changed and converted. You can use either SERVER or Unlimited edition per your requirements. To download the program simply visit our website, the link is in the description.
Video - this following video shows how to move a partition safely
Also read: how to shrink partition in Windows server 2012 ; or how to move unallocated space
Related Product
- IM-Magic Partition Resizer Server - Partition space redistributing software that works for Windows Server 2003-2025.