Enable/Install Disk Cleanup in Windows Server 2022 2019 2016 2012 2008 R2
Summary
Want to know how to enable disk cleanup server 2008/2012 r2 or server 2022 2019 2016 without reboot? This article will show you how to enable disk cleanup in server, and also show you how to free up your disk space, extend your disk partitions.

Updated on 2026/06/05
by Andrew Wright
Table of Contents
The added features and useful updates are the main reason why people go for Windows Server series at the first place. Windows Server is an amazing operating system specially designed for small to medium enterprises. However, many people experience low disk space on Windows server 2008 and 2012 R2. And if you’re reading this article, there are greater chances that you’re experiencing low disk system space and unable to find the disk cleanup tool in the server.
Enable/Install disk cleanup Windows Server 2022/2019/2016/2012
I’m amazed myself because they didn’t add the disk cleanup tool (cleanmgr.exe) in Windows Server 2008/2012 R2 by default. But you can still enable this option by using a Server feature known as “Desktop Experience”. However, after enabling the Desktop Experience, you must reboot your system. Moreover, it installs many other components, tools, and updates on the computer. Anyways, if you are willing to reboot the system, follow the steps below
Step 1 - Click Server Manager on bottom left, and then click the 2nd option "Add roles and features". And confirm the following steps that come along and leave everthing as default settings.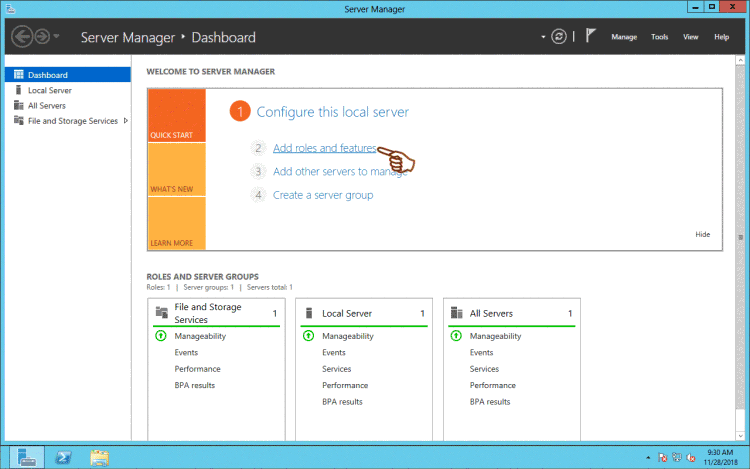
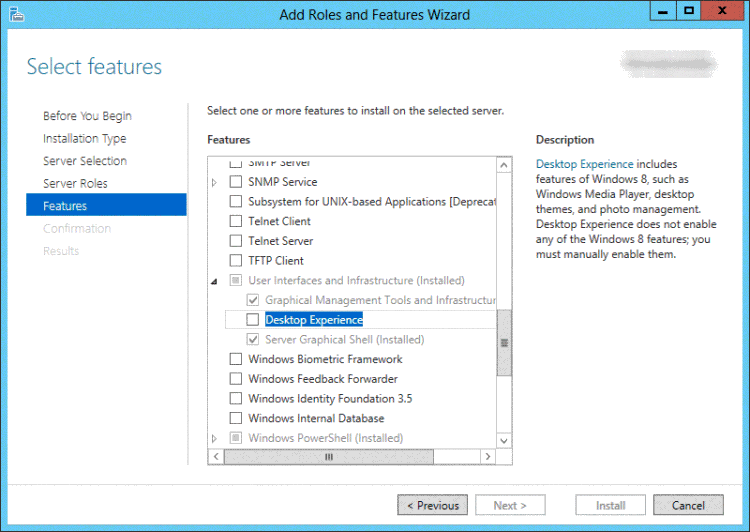
Step 2 - Click the triangle to unfold User Interface and Infrastructure, and then click the check-box in front of "Desktop Experience".
Step 3 -Get 'Desktop Experience' selected
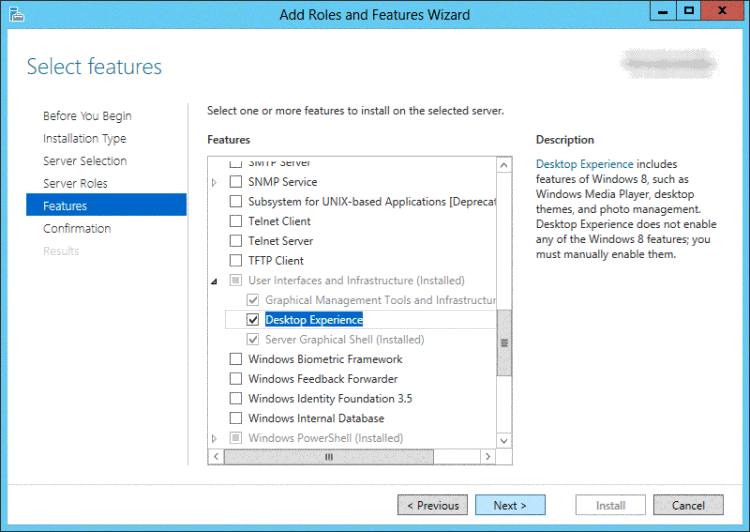
Step 4 - Click 'Include management tools', and click Add Features button
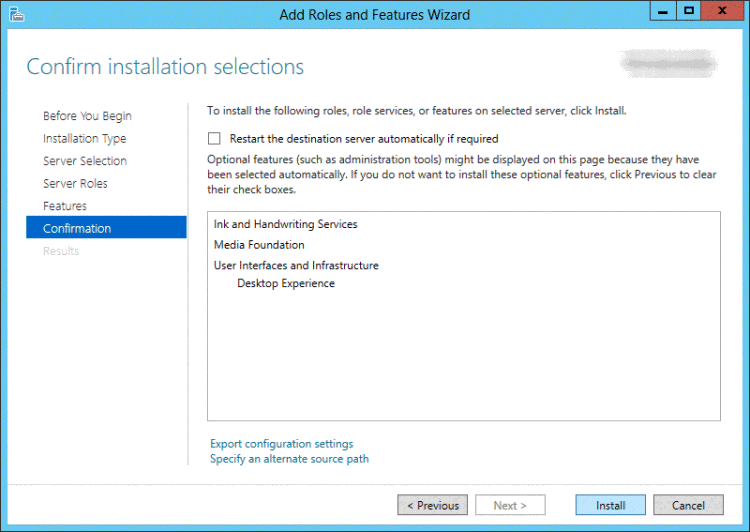
Step 5 - Confirm the installation by clicking 'Install'
Or you may use this following steps if possible
- Simply go to Programs and Features
- Under the Features Section click on Enable Desktop Experience
- Done!
Solution 1 to Enable Disk Cleanup Server 2008 R2 without a reboot
Copy the files at the following location
- C:\Windows\winsxs\amd64_microsoft-windows-cleanmgr_31bf3856ad364e35_6.1.7600.16385_none_c9392808773cd7da\cleanmgr.exe
- C:\Windows\winsxs\amd64_microsoft-windows-cleanmgr.resources_31bf3856ad364e35_6.1.7600.16385_en-us_b9cb6194b257cc63\cleanmgr.exe.mui
After you have found the files, copy the file cleanmgr.exe to C:\Windows\System32\, and copy the cleanmgr.exe.mui to C:\Windows\System32\en-US\. After this
- Press Windows+R
- Type “cleanmgr” and press enter
- Disk cleanup will pop-up
- It’s that simple
Solution 2 to Enable Disk Cleanup Server 2012 without a reboot (Not R2)
Note: Windows Server 2012 R2 needs an another method which is included in the following part. This one just works for Windows Server 2012.
STEP 1: Press Windows and X together on the keyboard and select Command Prompt (Admin), or PowerShell (Amdin)
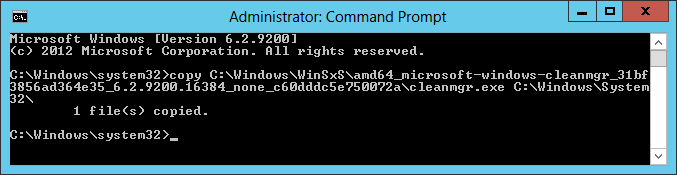
STEP 2: Copy and paste the command text in the command prompt window and press Enter to execute.
copy C:\Windows\WinSxS\amd64_microsoft-windows-cleanmgr_31bf3856ad364e35_6.2.9200.16384_none_c60dddc5e750072a\cleanmgr.exe C:\Windows\System32\
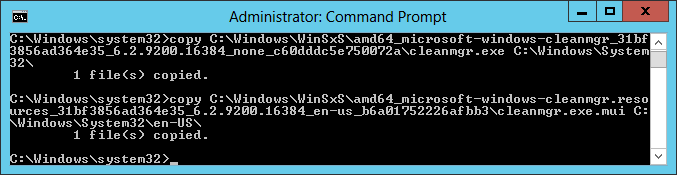
STEP 3: Copy, paste and execute the second command:
copy C:\Windows\WinSxS\amd64_microsoft-windows-cleanmgr.resources_31bf3856ad364e35_6.2.9200.16384_en-us_b6a01752226afbb3\cleanmgr.exe.mui C:\Windows\System32\en-US\
Unfortunately, Windows Server 2012 R2 does not support the above method and shows an error message if applied. Therefore, you must use the Desktop Experience feature to install/enable the Disk Cleanup utility.
You can use the following method to enable disk cleanup on Windows Server 2012 R2.
- Install Desktop Experience
- Reboot the computer
- Copy these files %windir%\system32\en-US\cleanmgr.exe.mui and %windir%\system32\cleanmgr.exe and paste them to any directory
- Uninstall the Desktop feature
- Reboot the server
- And then copy the above files to the same directories as in Windows Server 2008 R2
Note: Deleting temp files or disk cleanup may only save several GB disk space for your computer, if you want to extend c drive with more space, IM-Magic Partition Resizer Server can help redistribute unlimited GB from another drive(or unallocated space) to c drive.
3rd Party Disk Management: IM-Magic Partition Resizer Server
If the Disk Cleanup utility does not help you to free up enough disk space, then you can extend the system partition with unallocated spaces which can be created, moved, and extended to c drive without losing data using IM-Magic Partition Resizer Server. Or you may also use it defrag the server computer too.
See the function provided in the software.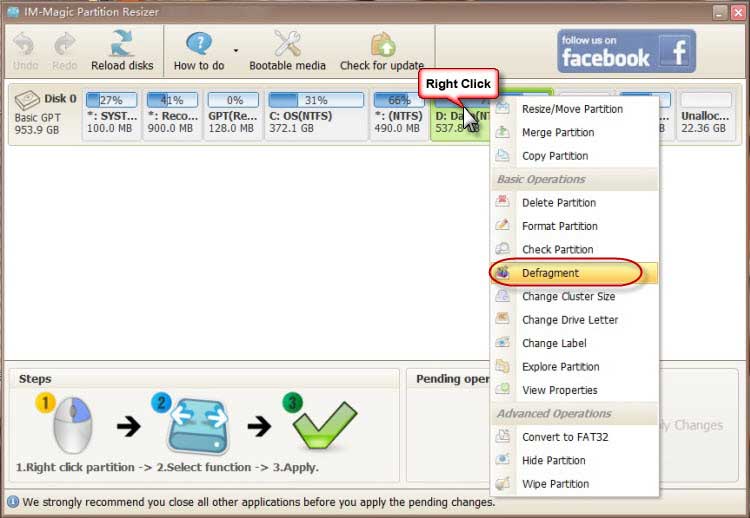
Besides the defragment, IM-Magic Partition Resizer Server also lets you shrink, extend, create, and resize partitions without any data loss risks. Here is how you can resize disk drive using IM-Magic Partition Resizer without data loss.
For Windows 11/10/8/7 => Download IM-Magic Partition Resizer Free (100% Free)
For Windows Server => Download IM-Magic Partition Resizer Server (Free Demo)
- Install and open the IM-Magic Partition Resizer Server or Unlimited Edition
- Right click on the data partition with enough free space and click on “Resize/Move”
- Drag the cursor to left over the bar indicating used/free space
- The shrink space will be grayed-out and marked as unallocated space
- Right click each partition and move them to get the unallocated space to the left until it reaches right next to c drive
- Skip the above step if unallocated space is already adjacent to c drive
- Open the c-drive and acquire the unallocated space
 Steps to shrink large disk space in Windows server 2012
 Steps to extend c disk space in Windows server 2012
Note that all the system and application files remain untouched during the whole process. IM-Magic partition resizer will not harm your computer or its content in any way. And if you still fail to free up disk space, add a new hard disk or change to a bigger one.
New added disk can be combined to the Server volumes using RAID array and then you can reditribute disk space from new disk to old disk.
More benifits of IM-Magic Partition Resizer Server.
- Clone disk
- Upgrade smaller to larger disk including the OS
- Manage disk spaces without losing data
- Move partition without losing data
- Move unallocated space without losing data
- Move the recovery partiton when Disk Management or Diskpart fails to delete, or move it
- Roll-back protection if anything happens unexpected even from power surge
More Related Articles You May Like
- shrink volume in Windows Server 2012 (R2) without losing data
- Add/move unallocated space to c drive Windows Server 2012 r2
- Powerquest partition magic download Freeware for partition resize
- Cannot extend system c drive in server 2012 disk management
- extend system c drive sbs 2008 without reinstalling Windows
Related Product
- IM-Magic Partition Resizer Server - Partition space redistributing software that works for Windows Server 2003-2025.