Free to Change Volume Label of Internal Hard Drive USB External
Quick Link
- 6 ways to change volume label on hdd, usb drive or external hard drive
- Change volume label diskpart command prompt
- Change volume label powershell
- Change volume label without format with free tool
What Is Volume Label?
A volume label, also called volume name, refers to the name of a digital device like hard disk partition, external hard drive, USB flash drive or other storage media. You can easily know what kind of data the device contains by assign a unique volume label to the device.
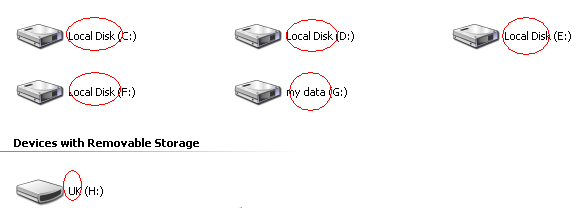
On Window computer, the internal hard disk partition often shows as Local Disk C, Local Disk D, Local Disk E, etc without a volume label. Sometimes, people consider the "Local Disk" as its volume label. A removable disk was usually labeled with its brand or model.
You can see the volume label of any disk by opening My Computer.
As the image showing below, the words in the red circle is volume label
6 Ways to Change Volume Label of Internal / USB Memroy Stick / External HDD?
Video: how to change drive label on Windows 11/10/8/7 (6 free ways without software)
Whether you want to change volume label of internal hard disk partition or USB drive, external hard drive, you can use any of methods below:
Method1: Change volume by opening Properties
Step1. Right click the partition that you want to reassigned a volume label and click Properties option
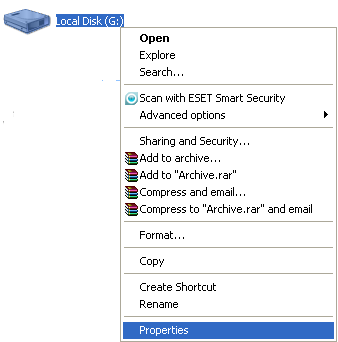
Step2. Enter the volume label you want to give to the selected drive and then click OK button

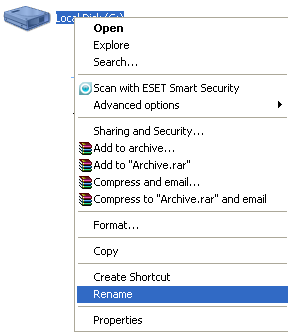
Method2: Rename the drive in My Computer
Right click the drive you want to rename and then click Rename option and then enter a new name to the selected drive
Method3: Format the partition to change its volume label
When you format any disk on your computer, you can change its drive label
Step1. Right click the device and click Format option
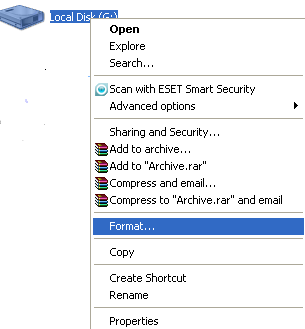
Step2. Enter a new label for the device and click Start to format
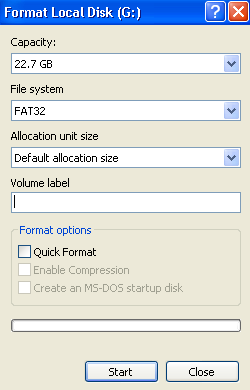
Notice: Format will erase the selected device, so move all data to another device in advance!
Method4: Change name of disk by Notepad
This method is easy and does not touch any data, you just need to follow the guide below:
Step1. Click Start > Programs > Accessories > Notepad to launch Notepad
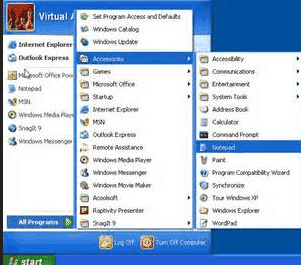
The methods to run Notepad may be different on different Windows.
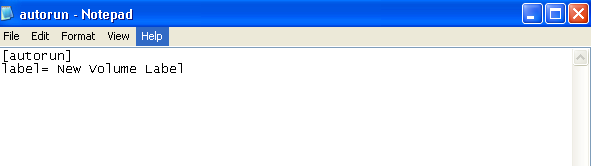
Step2. Rename the Notepad as autorun.inf and open it. Then, enter following contents without quotes to the Notepad:
"[autorun]
label= New Volume Label"
(New Volume Label refers to the label you want to assign to the disk)
Step3. Save the Notepad to the disk that you want to change volume label.
If it is a removable disk like USB stick, external HDD or memory stick, you can remove it from your computer and then reinsert it to see its volume label after changing.
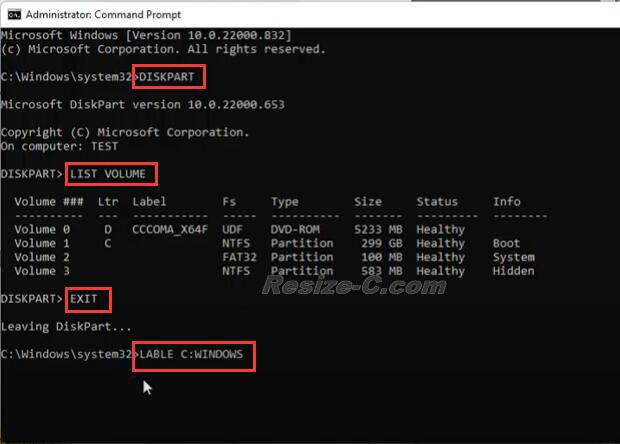
Method 5: Change Label of Partition with Command Prompt
Video: how to change drive label with command
To change the label of a partition using Command Prompt in Windows, follow these steps:
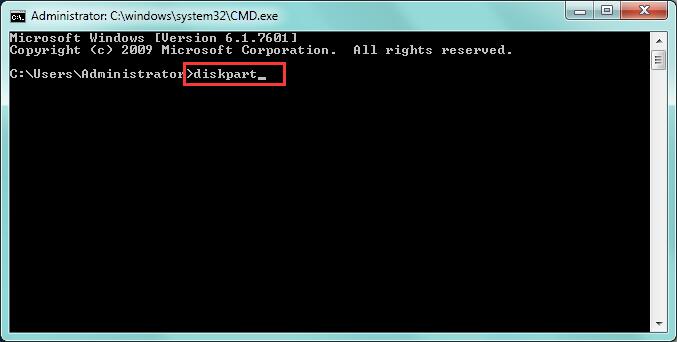
- Open Command Prompt by pressing Windows key + X and selecting "Command Prompt" from the menu. Alternatively, you can press Windows key + R to open the Run dialog box, type "cmd" and press Enter.
- Type "diskpart" and press Enter. This will open the DiskPart tool, which is used to manage disks and partitions.
- Type "list volume" and press Enter. This will display a list of all the volumes on your computer.
- Identify the volume whose label you want to change and note its volume number.
- Type "select volume X" (where "X" is the volume number) and press Enter.
- Type "label Y" (where "Y" is the new label you want to give to the partition) and press Enter. For example: if you want to lable x drive cool usb, you may type 'lable cool usb' and press enter.
- Type "exit" to exit the DiskPart tool.
Or you may directly use command line: "label H: cool usb" if you want to get H drive a lable 'cool usb', and press enter key to get the change.
Here is an example of rename c drive windows using command lines:
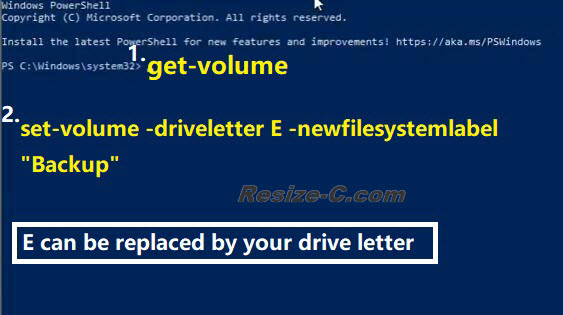
#6 Change volume label with powershell
To change the volume label of a drive using PowerShell, you can use the Set-Volume cmdlet. Here's an example:
Set-Volume -DriveLetter C -NewFileSystemLabel "NewLabel"
Set-Volume -DriveLetter C -NewFileSystemLabel "NewLabel"
In this example, the -DriveLetter parameter specifies the drive letter of the volume you want to change the label for, and the -NewFileSystemLabel parameter specifies the new label you want to set for the volume.
You can replace "C" with the drive letter of the volume you want to change the label for, and replace "NewLabel" with the new label you want to set.
Note that you need to run PowerShell as an administrator to change the volume label.
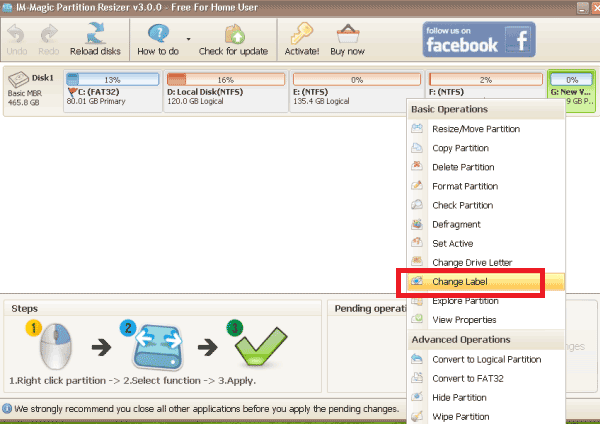
Freeware to Rename Volume Label without format
In addition to all methods above, you can use a free tool IM-Magic Partition Resizer to rename volume label. This software enables you to change drive label with 3 steps:
For Windows 11/10/8/7/Vista/XP/2000 ==> Download IM-Magic Partition Resizer Free
For Windows Server All versions ==> Download IM-Magic Partition Resizer Server
Step1. Right click the partition and select and select "Change Label".
Step2. Enter a new label and click "OK" button
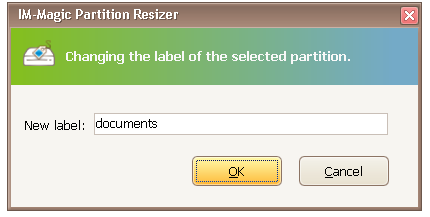
Step3. Click APPLY CHANGES in the software to get the above operations applied.
More Related Articles You May Like
- windows cannot reformat ntfs drive to fat32 - free to convert hard drive partition from ntfs to fat32 when windows cannot format it to fat32...
- server 2008 partition tool - how to change ntfs to fat32 file system on windows xp for free...
- partition magic software convert ntfs to fat32 - free download partition magic for converting ntfs to fat32 partition...
- convert ntfs to fat32 windows 10 - free to convert a partition from ntfs to fat32 without reformatting or touching any file...
- can you convert ntfs to fat32 file system - how do you convert ntfs partition to fat32 file system on windows computer...