How to Shrink Partition, Move Partition in Windows 11/10 Without Losing Data
This article includes the following parts
Part 1 - Shrink volume with disk management (It cannot move partitions)
Part 2 - How to move partition without losing data to extend volume (with Partition Resizer)
Part 1 - Shrink Volume Windows 10/11 with Disk Management
Note: Disk Management is unable to move partition/unallocated space, Partition Resizer is able to move partitions free and safely. Jump to Part 2 for moving partitions and extend partition with Partition Resizer.
In fact, if you simply want to shrink partition and create a new volume on Windows 10, you can accomplish the task under Windows 10 Disk Management:
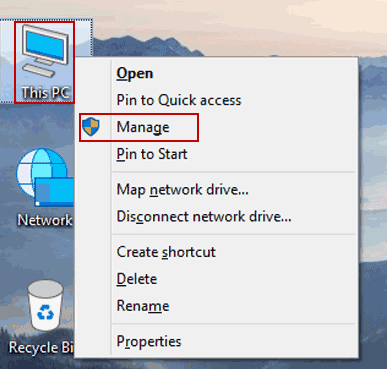
Step1. Right click "This PC" and then click "Management".
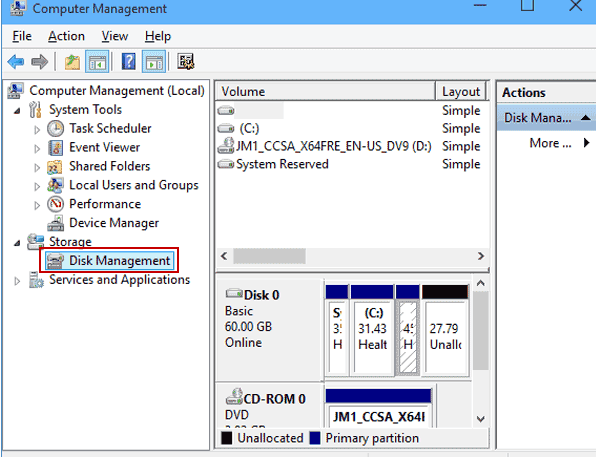
Step2. Click "Disk Management"
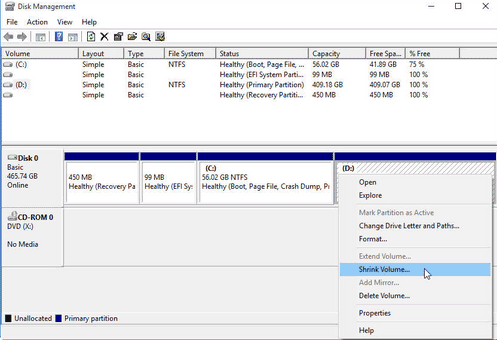
Step3. Right click the partition that has much free space and click "Shrink Volume" option.
Step4. Enter the amount of space and then click "Shrink" button. Now, you only need to wait patiently before the shrinking process is completed.
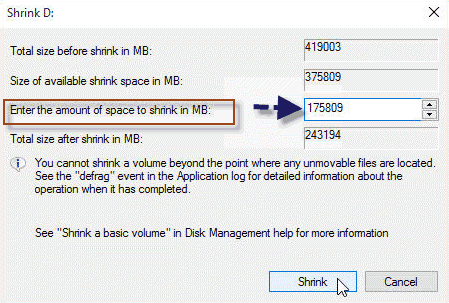
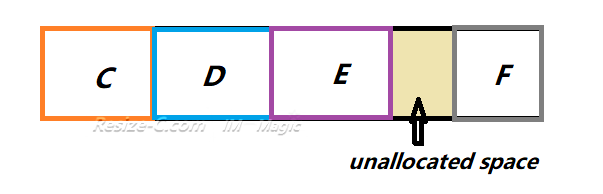
You can get some unallocated space after shrinking

The following steps 5-7 is for creating new partition with the unallocated space. There is also a guide in the Part 2 that shares how to move partition without data loss with free tool.
If you want to move the unallocated space to another volume, you may read this guide: how to move unallocated space
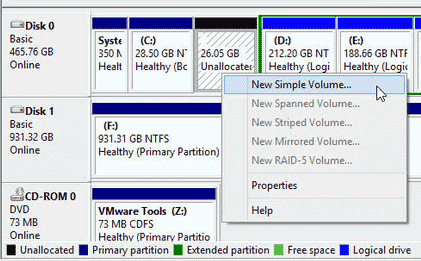
Step5. Right click the unallocated volume and select "New Simple Volume"
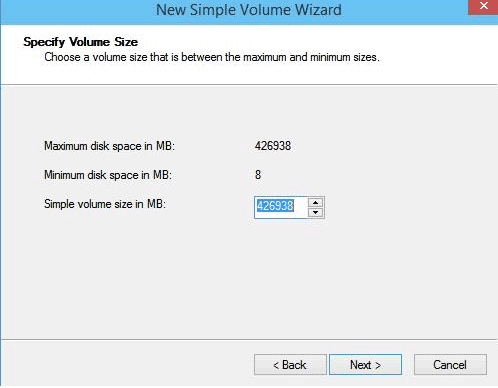
Step6. You can set the size and assign a drive letter to this volume and then format this volume
Step7. When the formatting is successfully, you can see a new volume.

If the Shrink Volume is disabled, or if you want to shrink volume with 100% data untouched, be free to use freeware Partition Resizer Free that works flawless in Windows 11/10/8/7.
Cons: Disk Management cannot move partition nor move unallocated space to another drive, however this moving partition can be done by free tool IM-Magic Partition Resizer.
Part 2 - Shrink/Move Partition or Move Unallocated Space with Free Tool
If you want to add unallocated space to another partition, or you want to move a partition without losing data to move the unallocated volume close to the partition you want to extend, for example, you want move the unallocated space close to C drive, free tool IM-Magic Partition Resizer can help.
Move Partition/Unallocated Space with Windows 10/11 Partition Software
IM-Magic Partition Resizer Free is a partition manager, which is compatible with all Windows 11/10/8/7 to extend volume, shrink volume, move volume and more. Therefore, you can rely on this software to free to move unallocated space close to the partition you want to extend, or you may use it to move any partition without losing files.
For Windows 11/10/8/7 => Download Partition Resizer Free [100% Free]
For Windows Server 2025-2003 => Download Partition Resizer Server [Trial]
See how it can move a partition without losing data in the following image.
This partition software provides safe solution for partition management without touching any previous data or hurting the operating system. Even if the process is interrupted due to sudden power off or other reasons, it does not cause any damage to your computer or hard disk.
Video#1: Shrink J, move D, extend C (how to shrink large volume, move partitions without losing data, move unallocated space safely)
Example: Shrink J Partition, Move D Partition and Unallocated Space to C Drive for Extending C
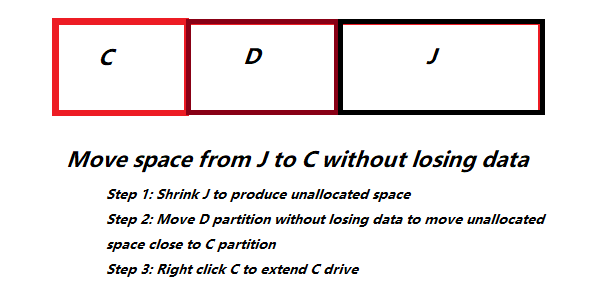
Step 1 - Right click J volume to shrink, and go to its function 'Resize/Move'
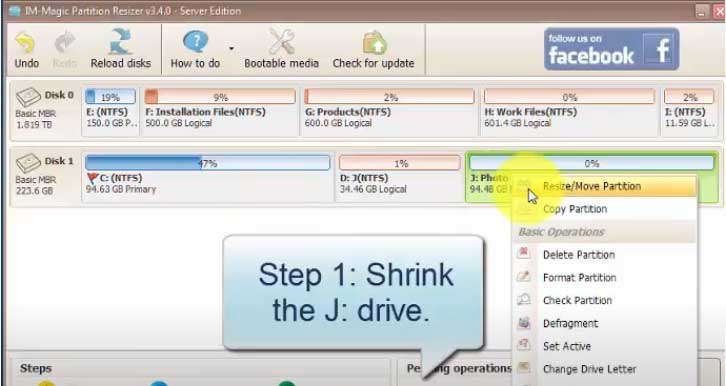
Step 2- Shrink the volume by moving its border rightward, and then click OK.
 Shrink drive and extend C drive with IM-Magic Partition Resizer
Step 3 - Move D partition (move the unallocated space) without losing data by right click D drive -> 'Resize/move Partition', and move the whole D volume right forward.
Step 4 - Right click C drive to extend volume with nearby unallocated space that was produced by shrinking J, moving D.
Step 5 - Click 'Apply' in the software to make the changes operated. And then the shrinking volume is done with freeware Partition Resizer Free in Windows 10/11/7.
The above steps are all included in the above video. You may watch the video carefully and do as it instructed if you want to move partition without losing data.
Also read: how to shrink partition to extend c drive
Video#2: Shrink C
For Windows 11/10/8/7 => Download Partition Resizer Free [100% Free]
For Windows Server 2025-2003 => Download Partition Resizer Server [Trial]
How to shrink or move disk volume on Windows 10? When referring to Windows 10 disk management, many people will come up with partition resizing, partition formatting, partition deleting, etc. Shrinking partition and move partition are two important processes for partition resizing on Windows 10. Whenever you want to extend a volume on Windows 10, you probably need to shrink volume first of all so as to create some unallocated space and then move the unallocated volume close to the partition you want to extend. Since shrinking and moving partition play such an important role in partition resizing, this article will share all free methods to shrink partition and move partition on Windows 10.
Why Do You Shrink Partition in Windows 10/11/7?
Shrinking volume is a process to squeeze some free space from a disk partition, after which the free space usually shows as unallocated volume. Usually, you may need to shrink partition on Windows 10 in following situations:
1. You want to move some free space from one partition to another partition that is running out of disk space on Windows 10. In this situation, you have shrink the partition that has much free space at first so as to squeeze some unallocated space and then you can add it to the partition that you want to extend.
2. You want to create new partition on Windows 10. Sometimes, you may want to create a new volume on your computer because there is not enough volume for data storage.
More Related Articles You May Like
-
windows 2008 r2 expand size of c partition in vmware - how to increase size of system partition on windows 2008 r2 in vmware..
Related Product
- IM-Magic Partition Resizer Server - Partition space redistributing software that works for Windows Server 2003-2025.