Copy/Clone Disk to Another Hard Disk Drive or SSD
Quick Links
- Clone hard disk to another hdd/ssd using free software on Windows 11/10/8/7
- CMD to clone disk to a larger/smaller hdd/ssd without software
Part1: Software to clone a disk to another hdd/ssd [Free tool Partition Resizer]
It's simple and easy to to manage a disk cloning using a free 3rd party cloning software such as IM-Magic Partition Resizer to clone the disk(hdd/ssd) to another hdd/ssd. Here is what the free tool can do for you.
- Clone the whole disk (c) or (c d e etc.) to another disk(ssd/hdd)
- Clone only disk with c drive to another hdd/ssd (discard the rest partitions)
- Resize disk volume if nessary without losing data per your need
What's speical: you can run the disk cloning tool even when the computer is running.
Step1: Download the free tool on Windows computers and install it.
Step2: Prepare the target disk. Connect the disk to pc via sata cable or usb enclosure if it's an external drive.
Step3: Launch the cloning software IM-Magic Partition Resizer. (2 different ways depending on whether it's the OS disk.)
Way#1: OS disk? Go to Tools -> Migrate OS Wizard option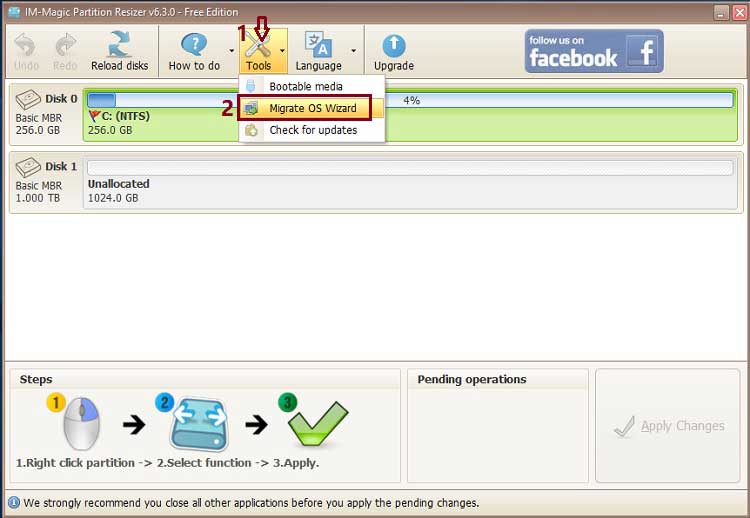
Way#2: Non OS disk cloning? Right click the source disk in Partition Resizer (Right click the disk icon, instead of the partitions)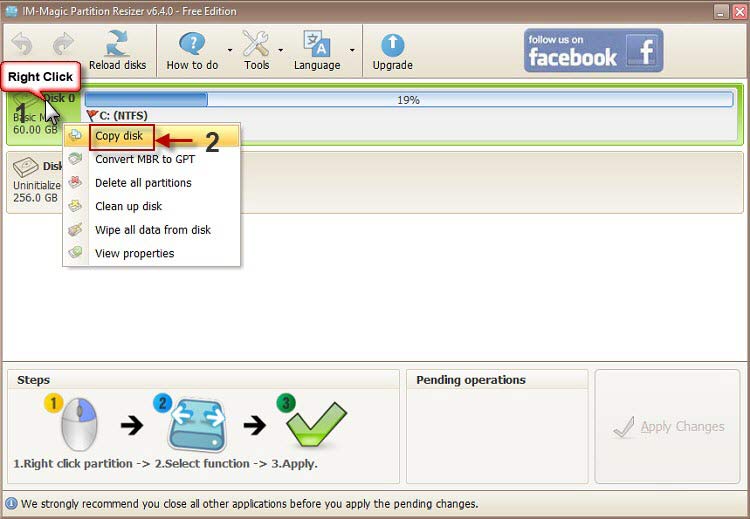
Note: 'Copy disk' is the function to clone a disk in Partition Resizer.
Here in the following screen it shows that the source disk is selected, it only needs you to click NEXT here. (If you want to change the source disk here in this step, you need to click the Disk number, for example, if you want to select disk 1 to clone disk 1, you need to click Disk 1 to get disk 1 selected, and then click NEXT.)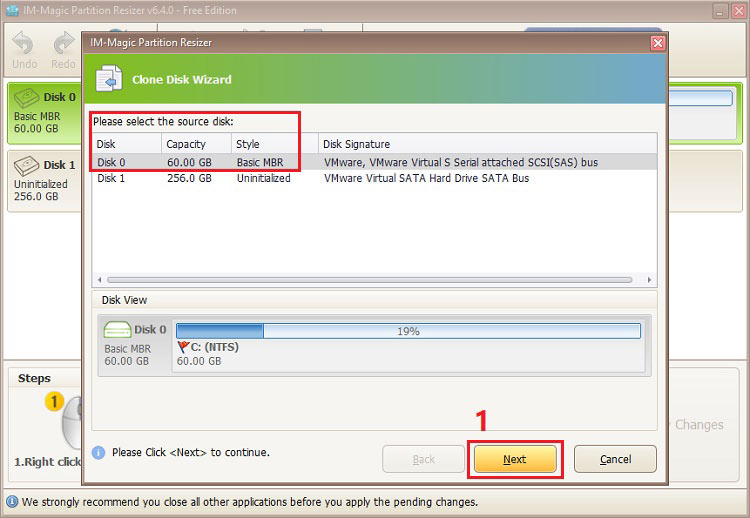
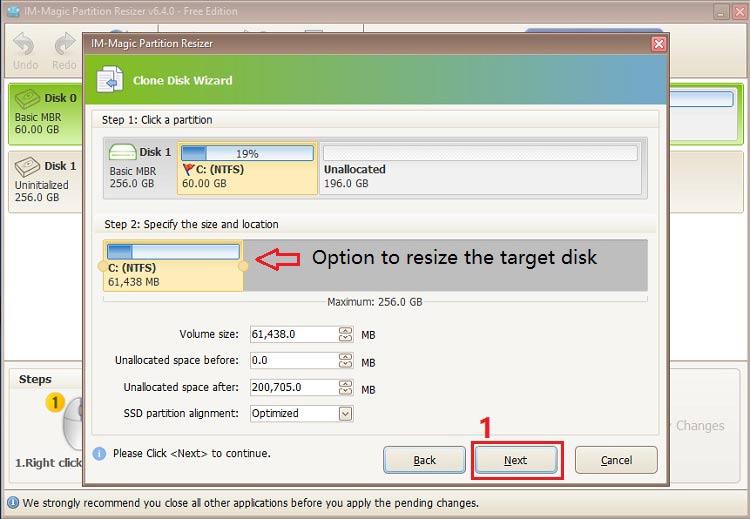
Step4: Select the target disks. 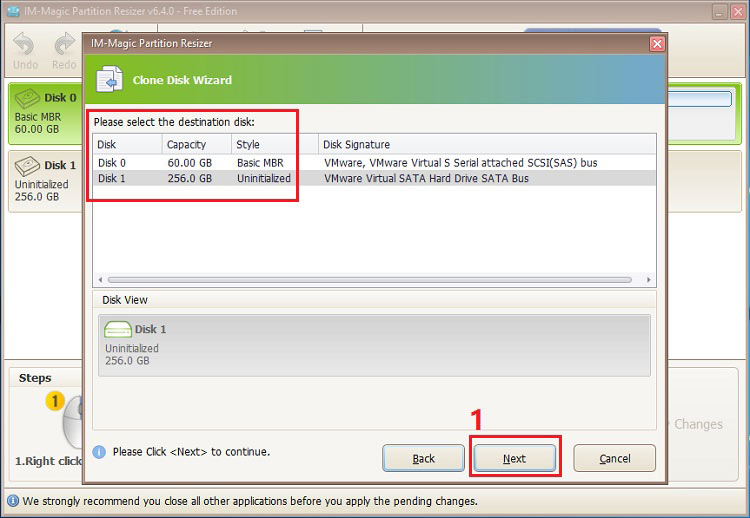
The following image will show you options to resize partitions.
(You may resize the target disk per your need, which is specially offered in Partition Resizer. For example, when your c drive is 60GB, however it only has 10GB data, the time you clone it, you may resize its size here to smaller than the whole 60GB.)
Step5: Confirm the cloning by clicking Finish button.
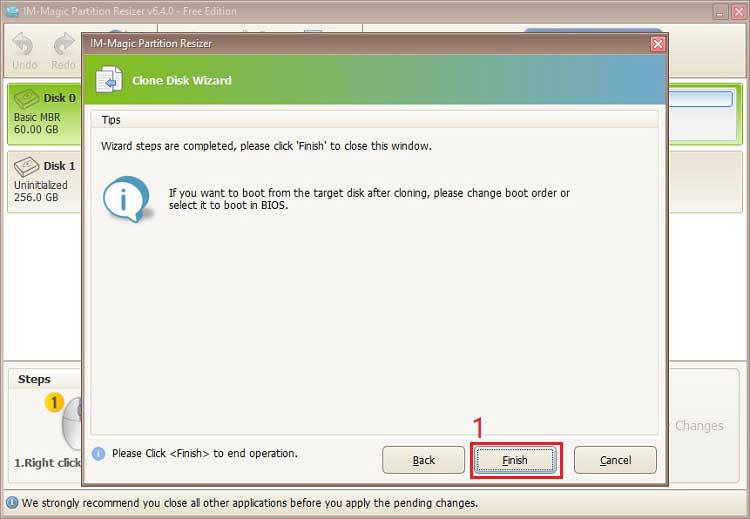
(This step shows the operations you need to do when you are cloning the disk containing the c drive, if you keep both the source disk and the cloned disk on the same pc.)
Step6: Click APPLY CHANGES button to proceed the cloning, and wait some time to get a cloned disk.
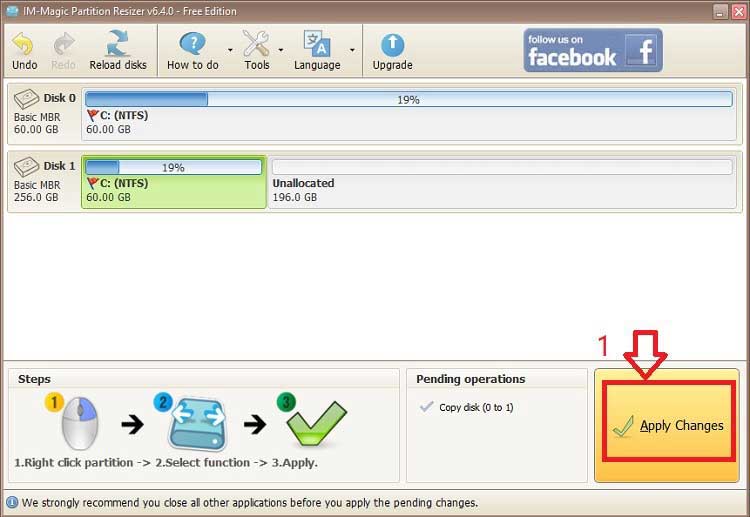
Note: Make sure that the target disk has enough capacity to hold all the partitions on the source disk.
Verify the cloned disk: Once the cloning process is complete, verify that the cloned disk is working correctly by booting your computer from it and checking that all the partitions are present.
Download Proper Version of IM-Magic Partition Resizer
For Windows 11/10/8/7/Vista/XP/2000 ==> Download IM-Magic Partition Resizer Free (100% Free)
For Windows Server All versions ==> Download IM-Magic Partition Resizer Server (Free Demo)
How long does it take to clone the whole disk?
This may take some time depending on the size of the source disk and the cloning method you chose.
How to change boot order in BIOS?
That's a general overview of the process to clone a disk containing multiple partitions to a new disk. Make sure to follow the specific instructions provided by the cloning software you choose, as the steps may vary slightly depending on the software.
Choose a disk cloning software: Besides free tool IM-Magic Partition Resizer, there are several disk cloning software available in the market, both paid and free. Some other popular ones include EaseUS Todo Backup, Macrium Reflect, Acronis True Image, and Clonezilla. Choose one that suits your needs and download/install it on your system.
Part2: CMD to clone hard drive to another hdd/ssd
The key: "xcopy [source] [destination] /clone"
To clone a disk to another HDD using xcopy, follow these steps:
- Connect the destination HDD to your computer.
- Open the command prompt by pressing the Windows key + R and typing "cmd" into the Run dialog box.
- In the command prompt, type the following command:
- xcopy [source drive letter]:* [destination drive letter]:\ /e /h /k
- Replace "[source drive letter]" with the letter assigned to the disk you want to clone, and "[destination drive letter]" with the letter assigned to the destination HDD.
- Press Enter to start the copy process. The /e switch ensures that all files and folders are copied, even empty ones. The /h switch copies hidden files, and the /k switch copies the attributes of the files.
Wait for the copy process to complete. This may take some time, depending on the size of the disk.
Once the copy process is complete, disconnect the destination HDD from your computer and use it as a clone of the original disk.
Note: It is important to make sure that the destination HDD has enough space to accommodate all the files and folders on the source disk.
Question: how to boot from Windows PE?
Video: how to boot computer from Windows PE
To boot to Windows PE, you will need to create a bootable Windows PE drive or ISO file. Here are the general steps to create and boot from a Windows PE drive:
- Download the Windows Assessment and Deployment Kit (ADK) from the Microsoft website and install it on your computer.
- Run the Deployment and Imaging Tools Environment command prompt as an administrator.
- In the command prompt, type "copype amd64 C:\WinPE_amd64" (without quotes) and press Enter to create a Windows PE image in the C:\WinPE_amd64 directory. If you want to create a 32-bit version of Windows PE, replace "amd64" with "x86" in the command.
- Type "dism /mount-image /imagefile:C:\WinPE_amd64\media\sources\boot.wim /index:1 /mountdir:C:\WinPE_amd64\mount" and press Enter to mount the Windows PE image.
- Type "dism /image:C:\WinPE_amd64\mount /add-driver /driver:C:\path\to\driver.inf" and press Enter to add any necessary drivers to the Windows PE image. Replace "C:\path\to\driver.inf" with the path to the driver installation file.
- Type "dism /unmount-image /mountdir:C:\WinPE_amd64\mount /commit" and press Enter to unmount the Windows PE image and commit any changes.
- Use a tool like Rufus to create a bootable USB drive or burn the Windows PE image to a CD or DVD.
- Insert the bootable Windows PE drive or disk into the computer you want to boot from.
- Restart the computer and enter the BIOS setup utility by pressing a key like F2 or Delete during the boot process. Make sure the boot order is set to boot from the USB drive or CD/DVD drive before the hard drive.
- Save the changes and exit the BIOS setup utility. The computer should now boot into Windows PE.
Once you've successfully booted into Windows PE, you can perform various tasks like disk cloning, system imaging, and recovery, among others.
Windows PE Start Keys
Here are some common keys for different brands:
- Acer: F12, F2
- Asus: F8, F9, F12
- Dell: F12, F2
- HP: F9, F10, F12
- Lenovo: F12, F1, F2
- Microsoft Surface: Hold the volume down button and press the power button
- MSI: F11
- Samsung: F2, F12
- Sony: F11, Assist button
- Toshiba: F12, Esc
Note that this is not an exhaustive list and the key to boot into Windows PE may vary depending on the model and BIOS version of your computer. If you're not sure which key to press, you can try searching online for the key to boot into the BIOS or boot menu for your specific model.
xcopy C:\ D:\ /clone
This will clone the original partition to the new partition. Note that this process may take some time, depending on the size of the partition.
For Windows 11/10/8/7, dowload free software => Download for Win 11-XP [Free Software]
For Windows Server 2025-2003, Download free Demo => Download for Win Server [Trial]
More Related Articles You May Like
- free to check partition for errors and bad sectors - free methods to check disk partition for errors and repair problems on it...
- Free disk cloning software download - free to clone hard disk partition on Windows xp, vista, 7, 8 ,10, 11...
- Copy partition to another hard drive